Trouble Shooting
Name of Parts for Sensor and Ingnition

Sensor Issue (Flames go off When the knob is released)
-
Square Grills (Model 100 & 400):
a. Turn off the main gas valve first.
b. Make sure all gas-outlets on the burners are clean and unblocked by dirt.
c. Make sure the sensor tip (1) covers the first two gas-outlets on the burner. (If needed, loosen up the sensor bolt to adjust it)
d. Detach the control box from the table top.
e. Unplug the positive end (2) from the prong and plug it back tightly. (Pliers may be used to unplug it.
f. Tighten up the negative end (3) if it is loose.
g. Turn on the knob and check if flames stay when knob is released. If the issue is not solved, replace the sensor with a new one and redo the process again.
 |  |  |
|---|---|---|
 |
BACK TO TOP
2. Round Grills (Model 200 & 300):
a. Turn off the main gas valve first.
b. Make sure the sensor tip is all the up through the burner hole.
c. Detach the control box from the table top.
d. Unplug the positive end (2) from the prong and plug it back tightly. (Pliers may be used to unplug it.
e. Tighten up the negative end (3) if it is loose.
f. Turn on the knob and check if flames stay when knob is released. If the issue is not solved, replace the sensor with a new one and redo the process again.
 |  |  |
|---|---|---|
 |
BACK TO TOP
No Spark or Delayed Spark
a. Check the battery and replace it if it is low or dead.
b. Check if the ignition wire is cut (disconnected) in the middle. Reconnect the cut wire.
c. Check if there is a short circuit somewhere between the control box to the igniter tip and wrap it up with an electrical tape thoroughly.
d. For Round Grills (200 & 300) make sure the igniter tip is positioned half way up in the burner hole. Adjust the height up and down for the strongest spark.
e. For Square Grills (100 & 400) make sure the igniter tip is pointing into the first gas-outlet on the burner.
 |  |  |
|---|---|---|
 |
BACK TO TOP
Dissembling Codes (Sensor/Igniter/Gas Pipe) from Grill Unit
To replace a sensor (or an igniter / gas pipe) , please follow the below direction step by step
-
Square Grills (Model 100 & 400):
a. Get ready with your square grills to remove parts out of the main unit.
b. Remove all accessories from the grill unit.
c. Remove the sensor/igniter cover.
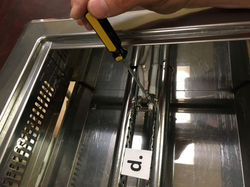
d. Unscrew bolt(s) to loosen up the sensor or the igniter.
e. Push the sensor (or igniter) towards outside a little bit.
f. From outside of the unit, pull out the sensor (or igniter).
g. To remove a gas pipe, disconnect one end of the gas pipe from the nozzle as shown in
the picture and another end from the control box using wrenches.
h. Remove the sensor/igniter/gas pipe from the control box.
 |  |  |
|---|---|---|
 |  |  |
BACK TO TOP
2. Round Grills (Model 200):
a. Get ready with your round up-draft grill to remove accessories from the main unit.
b. Remove all accessories from the grill unit.
c. Turn around the grill and unscrew bolts to release the burner from the unit housing.
d. Loosen up the bolt to let go of the sensor (or igniter).
e. Pull out the sensor from the bottom of the housing.
f. To repair the igniter, cut the wire where it needs to be fixed. Get an extension and connect it with an electrical tape.
g. To remove a gas pipe, disconnect one end of the gas pipe from the nozzle on the bottom of the main unit as shown in the picture and another end from the control box using wrenches.
 |  |  |
|---|---|---|
 |  |  |
 |  |
BACK TO TOP
3. Round Grills (Model 300):
a. Get ready with your round down-draft grill to remove accessories from the main unit.
b. Remove all accessories from the grill unit.
c. Remove all 4 bolts from the burner holder.
d. The burner holder can be flipped over.
e. With a right tool, loosen up the sensor (or igniter).
f. Flip over the holder and pull out the sensor (or igniter).
g. The sensor (igniter) can be pulled out from the outside of the main unit.
h. To remove a gas pipe, unscrew the pipe connector from the nozzle as shown in the picture and another end from the control box.
i. To fix the ignition wire, cut it where there is damage and connect it with an extension wire.
 |  |  |
|---|---|---|
 |  |  |
 |  |
